How to stamp with permanent nail polish
Do you want to give your permanent nail polish a unique touch without complicating things? In this article we tell you how to do stamping with semi-permanent nail polish to take your manicure to the next level. Easy, simple and fast are just some of the reasons why nail stamping will win you over.
As we have said, stamping is not a particularly complicated technique, but it does require certain materials and steps to follow to achieve a good result.

Stamping polish is a product specifically designed for this nail art technique. By using this product we can ensure that the stamped motifs look perfect with just one coat. In addition, unlike permanent polish, stamping polishes dry in the air , so they do not need to be cured in a lamp.
Below, we'll tell you what you need and what steps you should follow to be successful with your manicure nail art. Let's see how to do stamping with semi-permanent polish !

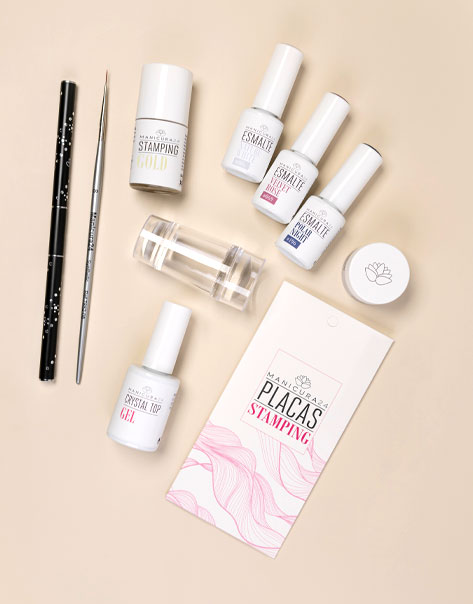
At Manicura24 we have two stamping kits that are perfect for getting started with this technique: the Basic Stamping Kit includes two stamping polishes, while the Oh My Stamping Kit contains two Art Paint Gel Thick instead.

Stamping as a nail art technique definitely allows you to experiment and try things out in a simple, uncomplicated way. If you don't like how a stamped design turned out or you simply decide on another design, it's as easy as removing the stamping polish with acetone-free nail polish remover and starting over.
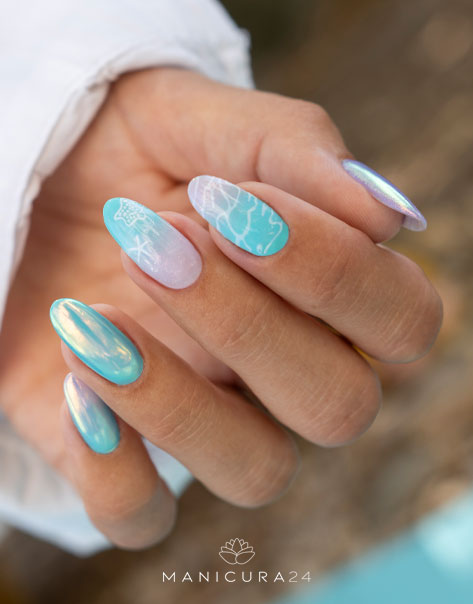
At Manicura24 we love creating designs and inspirational ideas with this technique and we are sure that, now that you know how to do stamping with semi-permanent polish , it will become one of your nail art basics.
WHAT IS STAMPING ENAMEL?
Nail stamping is a manicure technique, specifically nail art, which consists of stamping motifs and different designs on the nails in an easy and effortless way. With nail stamping, you can achieve designs of all styles without needing to have great freehand drawing skills. This technique allows you to create incredible manicures and practice nail art at home, achieving spectacular results.As we have said, stamping is not a particularly complicated technique, but it does require certain materials and steps to follow to achieve a good result.

Stamping polish is a product specifically designed for this nail art technique. By using this product we can ensure that the stamped motifs look perfect with just one coat. In addition, unlike permanent polish, stamping polishes dry in the air , so they do not need to be cured in a lamp.
Below, we'll tell you what you need and what steps you should follow to be successful with your manicure nail art. Let's see how to do stamping with semi-permanent polish !
STEP BY STEP TO DO STAMPING WITH SEMI-PERMANENT NAIL POLISH
Stamping is one of the simplest nail art techniques, so it can become your best ally if you like to decorate your nails by adding a personal and unique style.
This is a very versatile technique thanks to the variety of stamping plates available, which allow you to play with shapes, colours, overlapping designs... We could say that it is one of the best ways to personalise your manicure and create designs that totally adapt to your tastes.
This is a very versatile technique thanks to the variety of stamping plates available, which allow you to play with shapes, colours, overlapping designs... We could say that it is one of the best ways to personalise your manicure and create designs that totally adapt to your tastes.

MATERIAL FOR STAMPING WITH PERMANENT ENAMEL
If you want to do a stamping manicure with permanent nail polish , the first thing you need is the necessary material to do a permanent nail polish, that is: the base , the permanent nail polish itself in the color (or colors) you want to wear, and a finisher . Remember that before you start doing the permanent nail polish, you must properly prepare the nail , thus ensuring the adherence and durability of your manicure. In case you do not have the necessary material to prepare your nails and do a semi-permanent nail polish, we recommend the complete kits from Manicura24. In these permanent nail polish kits you will find everything you need to do a permanent manicure at home effortlessly , and you can choose the two nail polish colors you like the most!
To perform the stamping, you will need:
To perform the stamping, you will need:
- Stamping plate, choose the plate with the designs you want to stamp on your nails!
- Stamping polish
- Stamp for stamping with scraper
- Acetone-free nail polish remover
At Manicura24 we have two stamping kits that are perfect for getting started with this technique: the Basic Stamping Kit includes two stamping polishes, while the Oh My Stamping Kit contains two Art Paint Gel Thick instead.
STEPS FOR STAMPING IN PERMANENT NAIL POLISH
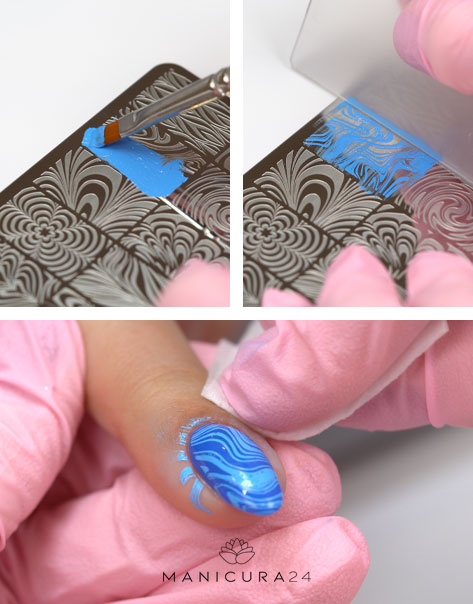
Once you have applied the layers of color of your permanent manicure and dried them under the lamp, it is time to do the stamping. You can follow these steps:
-
Make sure the stamper is completely clean . To do this, you can use a nail pad with Cleaner or acetone-free nail polish remover.
-
On a clean stamping plate, apply the stamping polish and remove excess product with the scraper, sliding it over the plate at a 45º angle.
-
Place the stamping stamp on the plate so that the design is completely transferred to the stamp, then transfer it to the nail. Remember that stamping polish is air-drying, so this process should be quick , preferably less than 15 seconds. If the polish starts to dry, the design will not transfer properly.
-
Use acetone-free nail polish remover to remove any excess nail polish that has been transferred to the skin. You can soak a nail pad, but be careful not to use it too much.
- Let it dry for a few seconds. When the stamping polish is completely dry, apply a coat of semi-permanent nail polish finisher to finish and cure under a lamp.

At Manicura24 we love creating designs and inspirational ideas with this technique and we are sure that, now that you know how to do stamping with semi-permanent polish , it will become one of your nail art basics.


Leave a comment
This site is protected by hCaptcha and the hCaptcha Privacy Policy and Terms of Service apply.